Aerial Digital Photography from a Balloon for Fifty Dollars

Taking photographs from the air is theoretically straightforward. There are two things
you need to do. You need to get the camera in the air, and then you need to trigger the
shutter.
To trigger the shutter, there are basically three options:
mechanically triggering the shutter from the air, electronically triggering the shutter
from the air, and using a built-in feature of the camera to trigger the shutter from
the air.
To get the camera in the air, there are basically three options: a balloon, a
kite, and a rocket.
The triggering device and the lifting apparatus determine the camera, and vice versa. If
you are
looking for a particular level of photographic quality, or if you already have a camera
you wish to use, it may be very expensive to build the triggering device and lifting
apparatus to use that camera.
Getting the Camera in the Air

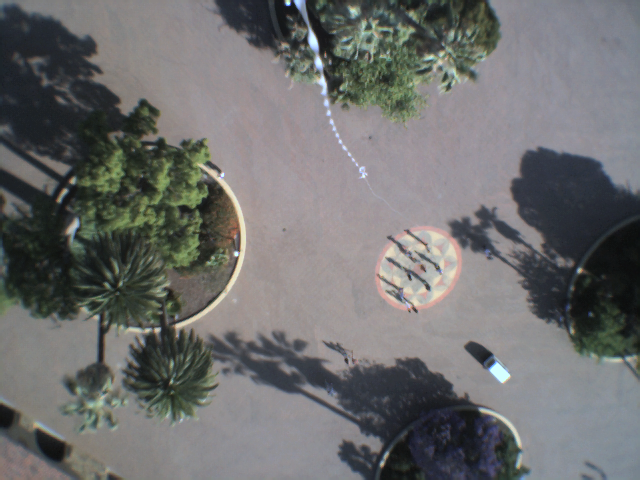
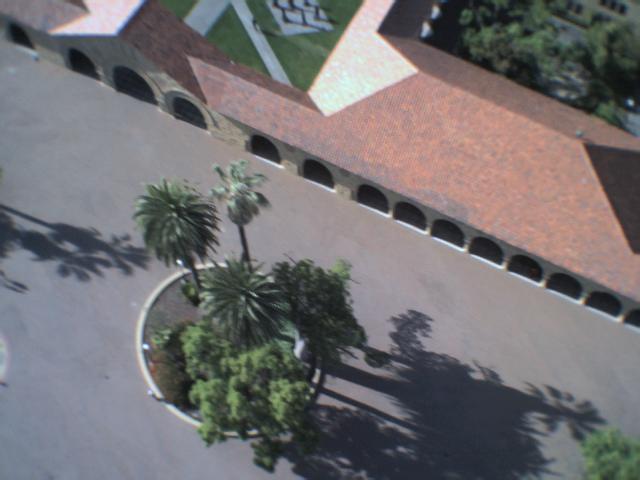
Stanford Quad - click for original bitmap
Even with the lightest camera requires a surprising force to get off the ground. You
either need a strong wind or a big kite, or a big balloon. Some archeologists are able
to use frame-mounted 35mm SLR cameras by flying kites about ten feet wide in the
desert. (Do a Google search for “kite aerial photography.”) Another place to find strong
winds is at the seashore. If you’re
interested in taking pictures near the sea, a kite might work well for you.

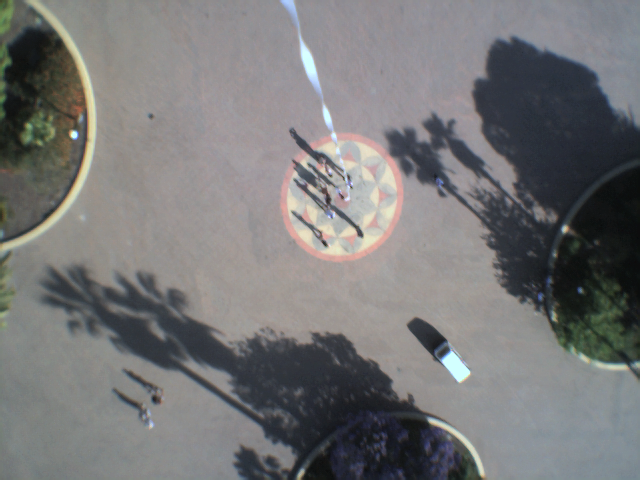
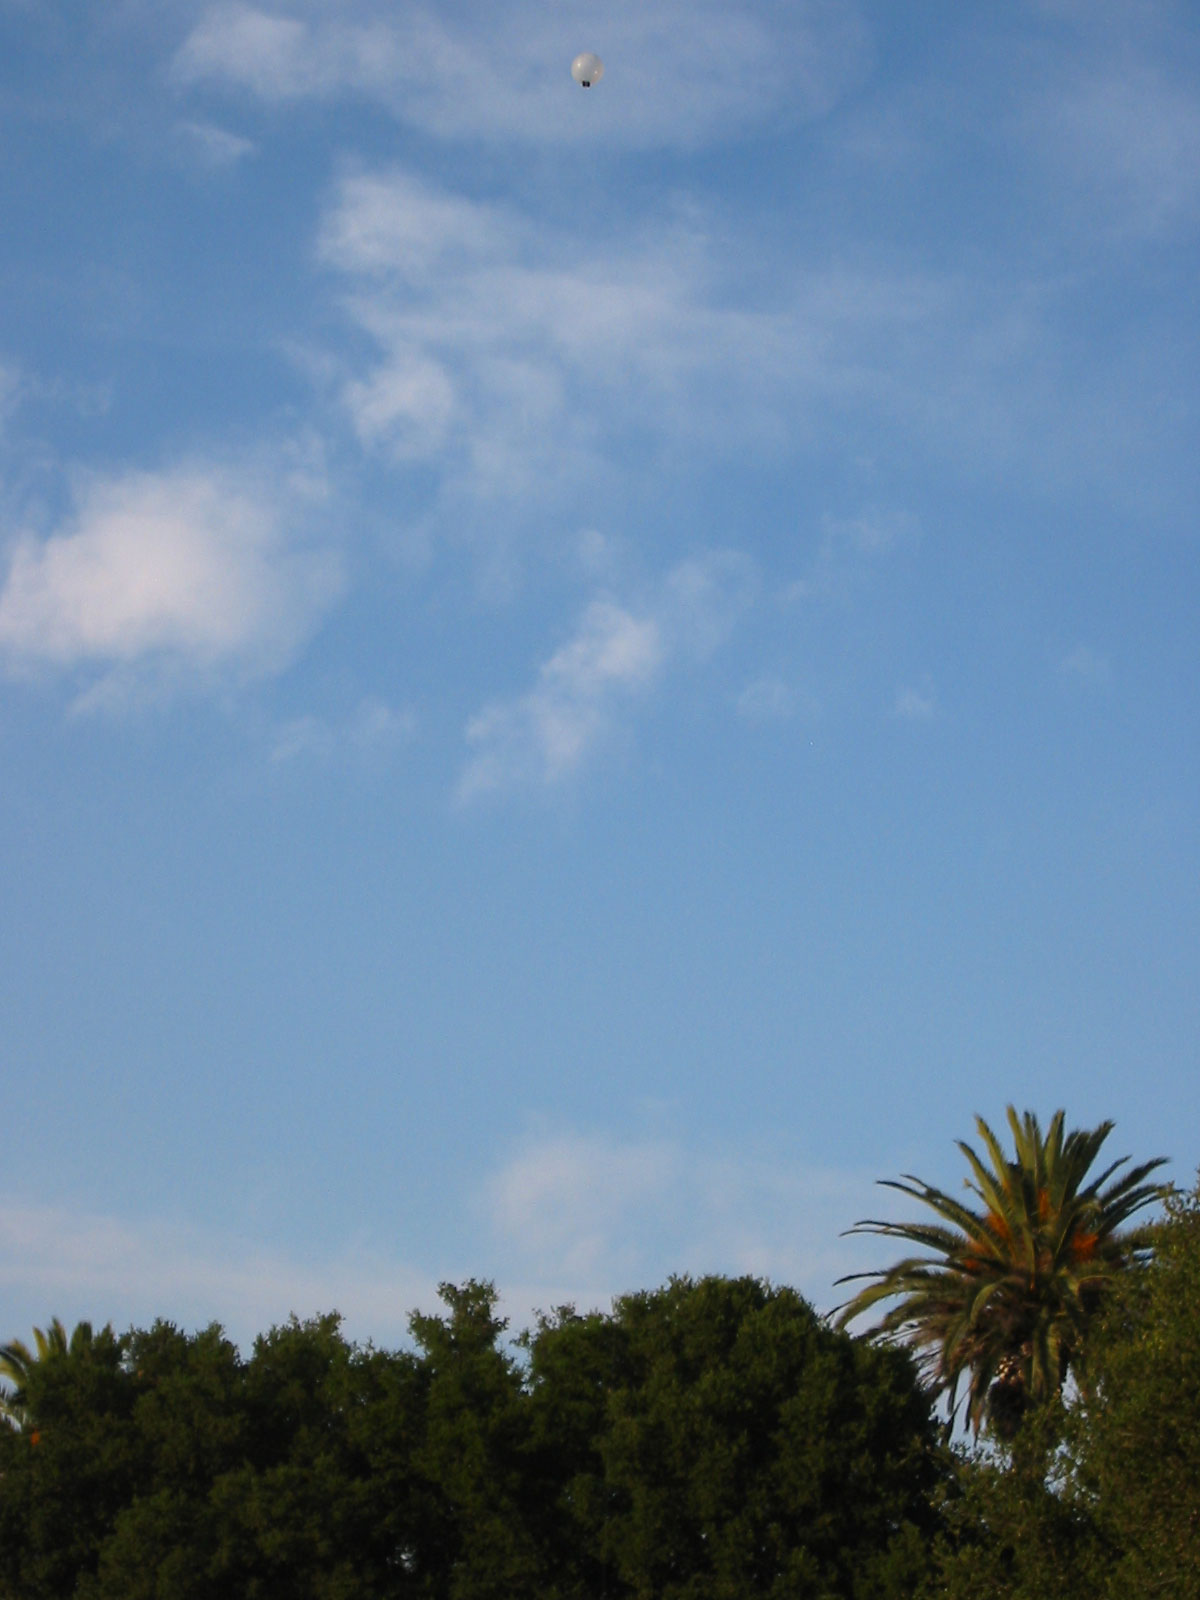
Luke Biewald and the balloon
Where winds are less strong, a helium balloon on the end of a kite string can act as a
sort of enhanced kite. The balloon Luke and I used ascended at 10 feet per second,
pulling the line off the spool with the camera board installed. An advantage of
ascending quickly is that, because the camera can only take a limited number of pictures,
especially if the camera is a lightweight one with built-in memory, getting the
camera up quickly means the line can finish unspooling before the pictures are
used up. But like a kite, a balloon will move with the wind. To get maximum altitude,
you must wait until the air is completely calm.

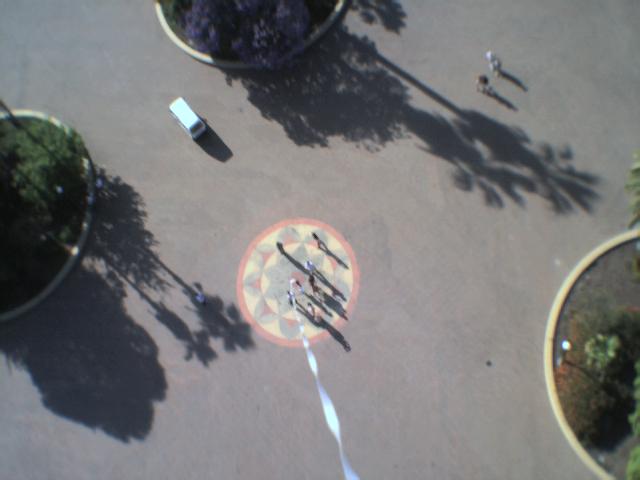
Kirstin Cummings and the shark kite
There are basically two classes of balloons: party balloons and weather balloons. Party
balloons are cheap and measured in inches. Weather balloons are ass expensive and
measured in grams. I have never used a weather balloon. The largest party balloons I can
buy are 40” inches across, and they are sold by a party supply store on Veterans Blvd.
in Redwood City. They cost $5.95, including helium. I did some quick informal tests, and
it appeared that my balloon could lift about eight ounces.

Stanford Quad - click for original bitmap
There are two “normal” options for string: kite string and monofilament. I used 600
feet of kite string for the pictures you see on this page. Kite string is strong and
doesn’t tangle that much, but it is heavy. Fishing line is totally
the opposite,
with the added advantage of being cheap enough to be disposable. You can buy 900 feet of 30-lb. test
at Target for two dollars. Wal*Mart has an even bigger selection. Although the word
“disposable” normally conjures phrases like “wanton waste” and “self-absorbed yuppy,” in
fact fishing line is intended to be
changed regularly. Fishermen will change their line every day to prevent breakage, and
with the line lengths we’re using, the likelihood of breakage is that much higher.
Something to keep in mind is that the
main thing that causes monofilament breakage is abrasion, so don’t let the monofilament
rub against anything. I
plan to fly with monofilament later in the summer, and will post pictures when I do.
In addition to the normal options, you might also use steel wire or kevlar, which were
used in setting record kite altitudes in Antartica.
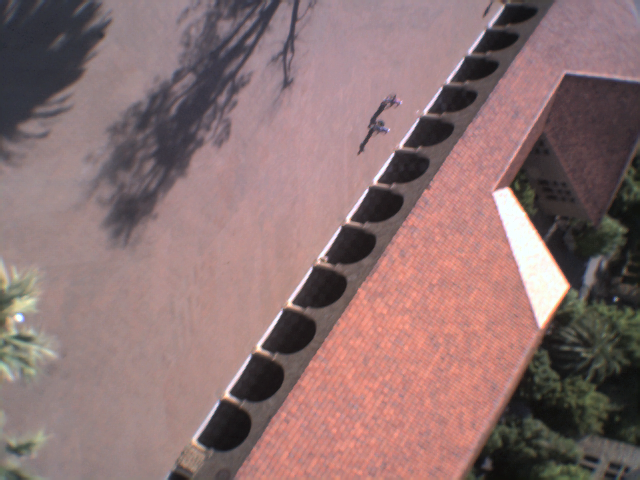
What about Rockets?
Stanford Quad - click for original bitmap
One way to easily get the camera off the ground is to use a model rocket
engine. A model rocket has several advantages: It goes to thousands of feet without
much effort. It is cheap. It is relatively reliable, both to launch and to retrieve.
But a rocket has serious disadvantages:
It is very difficult to mount a camera inside a rocket, for total mass, mass
distribution, and space reasons.
It is difficult or impossible to recover a rocket, unless your goal is to take
pictures of green, open fields.
“Sky” pictures are all too probable.
Taking more than a few pictures is not possible.
That said, you can buy inexpensive kits in the store that will take one picture on film at
the apogee of the flight.
Triggering the Camera

Trigger circuit
Some digital cameras are very easy to trigger on an interval basis: If you put the
camera into timer mode and hold down the trigger, it will restart the timer after
taking a picture. If you have a camera like this (at least one Kodak camera had this
feature), your problem is solved. Tape a
penny to the top of the camera and you’re good to go. Mechanical triggers, as on
antique 35mm SLR cameras, would seem very difficult, assuming you could even lift the
camera into the air.
The camera I chose uses an electronically controlled shutter, that is, the shutter
button is nothing
more than a switch. To trigger the camera, we need to wire an electronically controlled
switch in parallel with the shutter. I used a relay from Radio Shack as an
electronically controlled switch. You might wonder if a bipolar transistor would work
instead of a relay. The answer is no, not unless the power supply of the camera and the
timer are wired together to make a common reference. If you look at the circuit
photograph of the timer I built,
you can see where there is an extra resistor and transistor where I briefly tried to make
this work. More exotic solid-state switches may work, but I have no experience with them.
Aside from ease of implementation, there are two other advantages to a mechanical
relay. First, the resistance of a relay is negligible, while a solid-state switch will
drop the voltage, perhaps too much for the camera to trigger
reliably. Second, a mechanical relay will make a “ticking” noise when it works, and
I’ve found the ticking noise to be a foolproof way of ensuring the timer is ready for
launch. Mechanical bounce isn’t a problem because the relay is replacing another
mechanical switch. One caveat to wiring the relay is that you want the relay to be
open when the circuit power is off, assuming the shutter button is normally open.
Stanford Quad - click for original bitmap
The other active component of the timer circuit is a standard 555 timer chip with
supporting capacitors and resistors. There are several types of 555 chips. Radio Shack
sells a TTL version and a CMOS version. The difference for us is that the TTL version
both consumes more power and can source/sink more power. A different relay or a
solid-state switch might require less power, letting you use the CMOS version. You don’t
need to use a chip carrier, especially if you are confident in your soldering skills.
But a carrier is lightweight and cheap, and replacing a toasted chip is far more
difficult than replacing any of the other components in this circuit. The choice of
resistor values and capacitor values depends on the timer interval you want. The camera
I used shut itself off after 30 seconds of inactivity, so the revised version of my
board (not shown) triggers the relay once every 25 seconds. The initial version (shown)
triggers the relay about every three or four seconds. It used a 110k resistor, a 220k
resistor, and 10 uF capacitor. A shorter value makes it easier to futz around with the
multimeter and gives you more “takes” of a particular scene on the ground, but a longer
value lets you get the balloon higher and gives it a chance to stabilize. I also
used a 10 uF capacitor between the power rails, and a 10 nF between pin five and
the negative rail. Tantalum capacitors are the way to go. They’re only two or three
times the price of a normal electrolytic capacitor, and they give you a lot more room on
the board. They are polarized, though, just like a normal electrolytic, so make sure you
put them in the right way.
Balloon over the Stanford Oval
There are two considerations when thinking about the power supply: how much it weighs,
and how reliably you can clip the battery into the circuit. Six volts is ideal, because
the timer drops the voltage a little and the relay has a narrow operating range, but it
is easy to work with a higher voltage. Radio Shack sells a 6V battery that is slightly
shorter than an N cell and slightly wider. I bought an N cell holder, also from Radio
Shack, and melted the holder to fit the battery with boiling water. Unfortunately, the
battery tended to pop out even after being taped down.
I decided to go with a 9V battery
for the extra reliability, with the added advantages of being inexpensive and quick to
disconnect when the balloon landed.
Using more than six volts requires a voltage regulator; visible as the
tabbed three-pin IC in the picture. The voltage regulator was a
five
volt regulator, purchased from Fry’s Electronics, which means that the
regulator has to go on the timer output, not the timer Vcc. Fortunately, the TTL 555 can
source enough power to drive a relay through a voltage regulator, and the 555 can run
on a wide range of voltages.
On my circuit, the 9V was heavier than the camera and heavier than the timer.
I have read about people who cut the wrapper off a
9V and removed two cells, giving a lightweight 6V with secure connections. I would
probably use a cut-down 9V on my next flight if I weren’t hesitant about modifying a
circuit that works.
Opening the camera is probably the most nerve-wracking part of the project. ESD and
dust are both things to keep in mind. I used pre-cut wire-wrap wire to solder to the
switch pads. Magnet wire would probably also work. As always, the thing to remember
about soldering is that it reinforces existing physical connections, it doesn’t
fill gaps.
I don’t have a neatly written schematic, but it’s pretty easy to describe the
connections. 10 uF between the power rails, pin 1 to GND, pin 2 both to pin 6 and through C to GND, pin 3
through voltage regulator to relay to GND, pin
4 to Vcc, pin 5 through 10 nF to GND, pin 6 through R2 to pin 7, pin 7 through R1 to Vcc, pin 8 to Vcc. R1
and R2 I picked to be 110k and 220k. C I picked to be 10 uF for fast timing and 50 uF for slow timing.
Choosing a Camera

Vivitar 5 disassembled
I used a Vivitar 5 keychain camera. The camera is small, light, and cheap. I bought it
for $37 at Fry’s Electronics. The downside is that the optics are horrible. Because the
9V battery accounted for most of the weight and the timer weighed about as much as the
camera, it would seem that the optimal approach would be to find a camera with a
“repeating timer” feature as I mentioned above, and use that, dispensing with the timer
and second power supply altogether. Failing that, a more expensive miniature camera would
also work well. It all comes down to mass and cost.
Getting the pictures off the camera was a pain in the ass. The Vivitar 5 does not
have Mac drivers, so I had to use my old Win98SE laptop to download the pictures.
The driver did not work with the Windows TWAIN photo editor software, yet I found a
shareware, time-limited program called ACQUIRE that did work. Even more fortunately,
after this balloon camera project appeared on Slashdot.org, someone kindly e-mailed
to recommend a free program called
TwainTiffBatcher.
It works just as well, because it relies on the same
underlying library. Both the
program is free and
library is
free for our purpose. Incidentally, the Vivitar driver does with the Windows XP
photo editor software.
Mounting the Circuits

Luke Biewald and the board
The whole shebang was mounted with electrical tape on a piece of cardboard. The
cardboard was slotted to fit behind the balloon’s knot, ensuring the camera would
always point down. Be sure to tape the slot behind the knot, because otherwise the board
will fall.